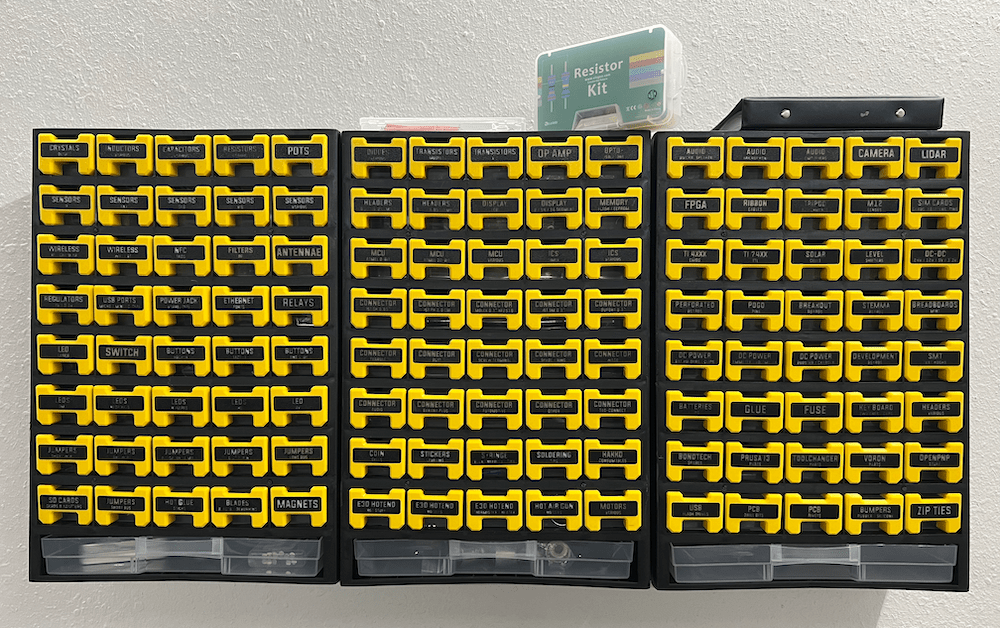
I am working on a mod for Harbor Freight 40 Bin Organizer. This Organizer is perfect because I have a lot of small electronic components, and I store them in various places in my lab, and it’s often hard to find where they are when I need them.
The motivation to modify the organizer comes from the fact that it’s up to the user to label the bins, and my brand colors are Yellow and Black, so I want to bring the organizer to follow the same color scheme that I follow for other things in my Lab.
I am using the Facade from a mod by Zack Freedman, and since I have a 3D printer with a Multi-Material Unit (MMU) that can print multiple colors, I decided to go with 3D printed labels. While I am at it, why not go with glow-in-the-dark labels instead? 😃
But, I soon recognized that the entire workflow for 3D printing labels would be quite tedious. First, you design them on Fusion 360 individually and then export them into multi-part STLs. This is not ideal because now you have to deal with one STL file per character for every label. For one or two labels, this is fine, but if you are printing 120 labels for three 40-Part Organizers, you will end up with thousands of files. So, when you import these thousands of files into your favorite 3D Printer Slicer software, you have to arrange these files properly on the build surface and then select each character individually to add color. Quick tedious!
So, For the labels, I decided to ditch Fusion 360 and use OpenSCAD instead. I went with OpenSCAD because when you have repetitive patterns or shapes, you can generate them using code in OpenSCAD. I took the label measurements from Zack’s design, and with OpenSCAD, I wrote a simple script to generate just one label.
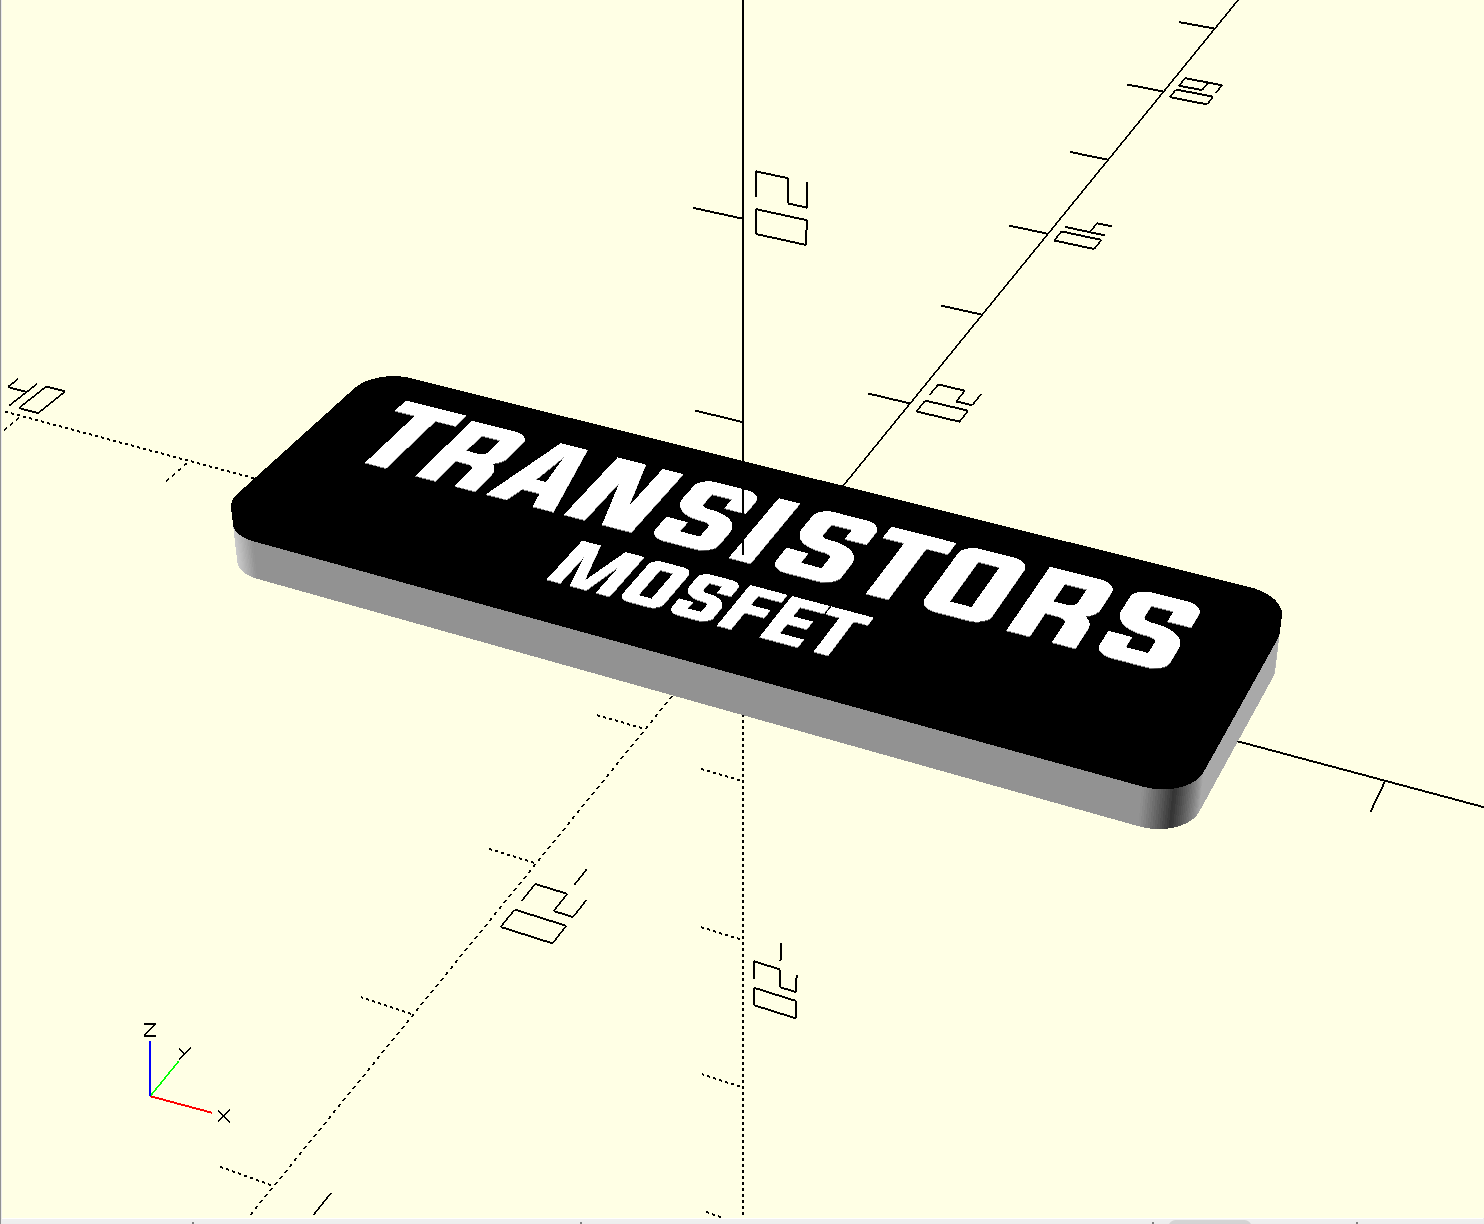
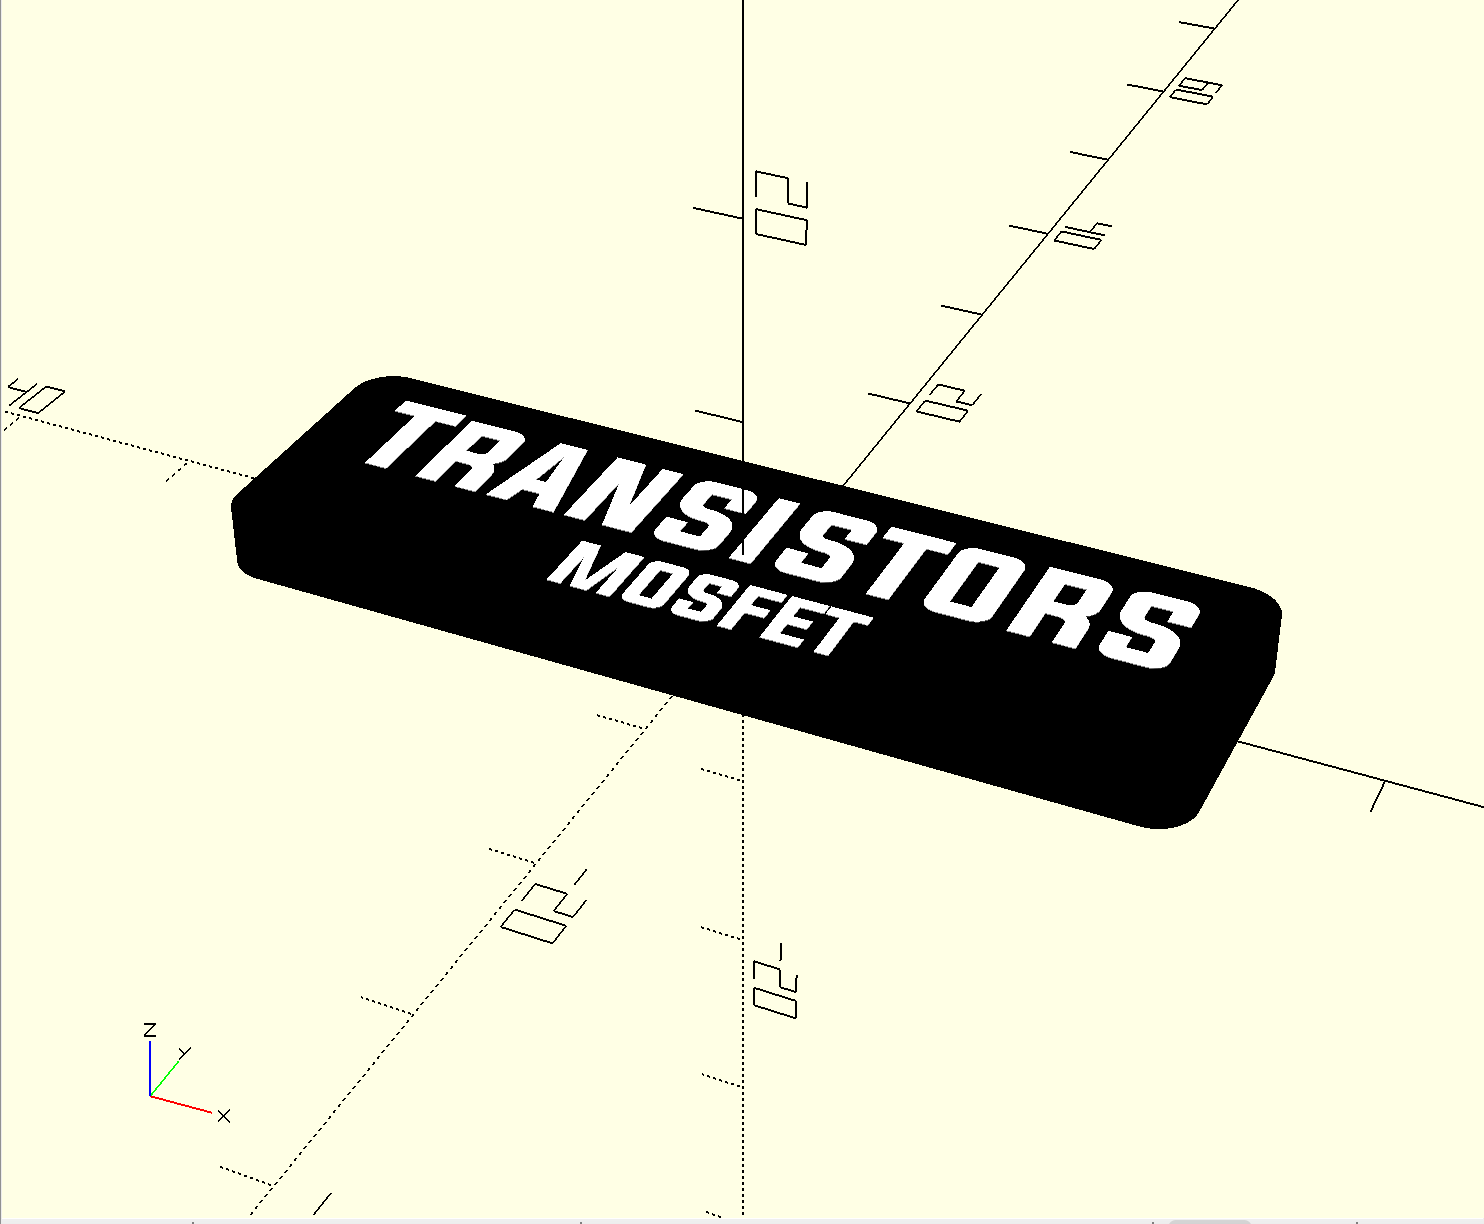 Initial OpenSCAD Render
I then tried writing it with white and black filament, and it came out great!
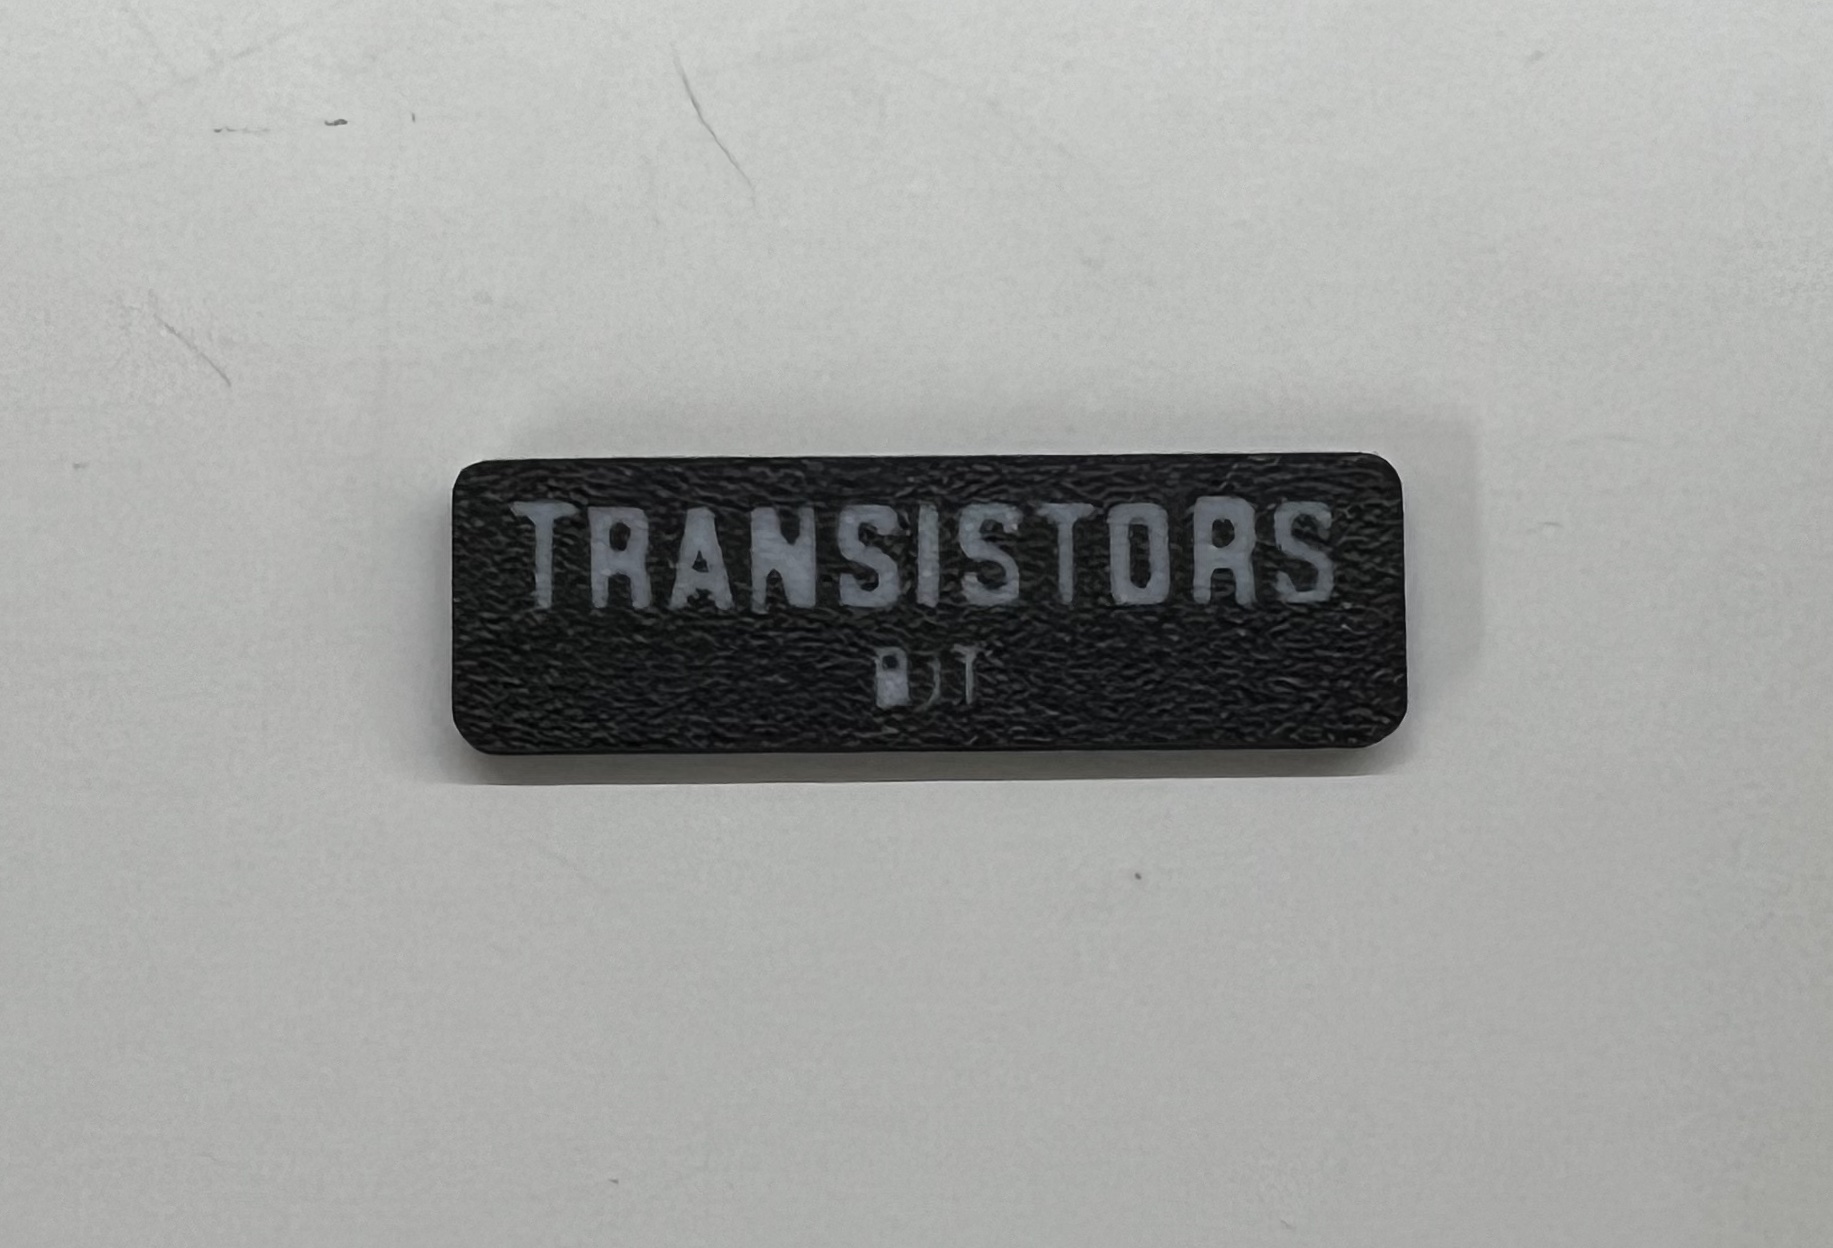 Black & White 3D Print of the Initial Render
I ran into a tiny challenge with this approach. Unlike Fusion 360, OpenSCAD doesn’t have a multi-part STL export option. So, you have to selectively comment out parts of code or put the code inside conditional statements to generate STLs for different colored parts individually. It’s a bit tedious, but it’s okay for now. We will get to that in a little bit.
Now that one label prints well, the next step is to generate a grid of labels that can all be printed in a single batch. This doesn’t only save time but also filament because, with MMU prints, you end up wasting a lot of filament for the purge block, so it’s better to print as many copies as possible at the same time because it is going to use a single purge block either ways.
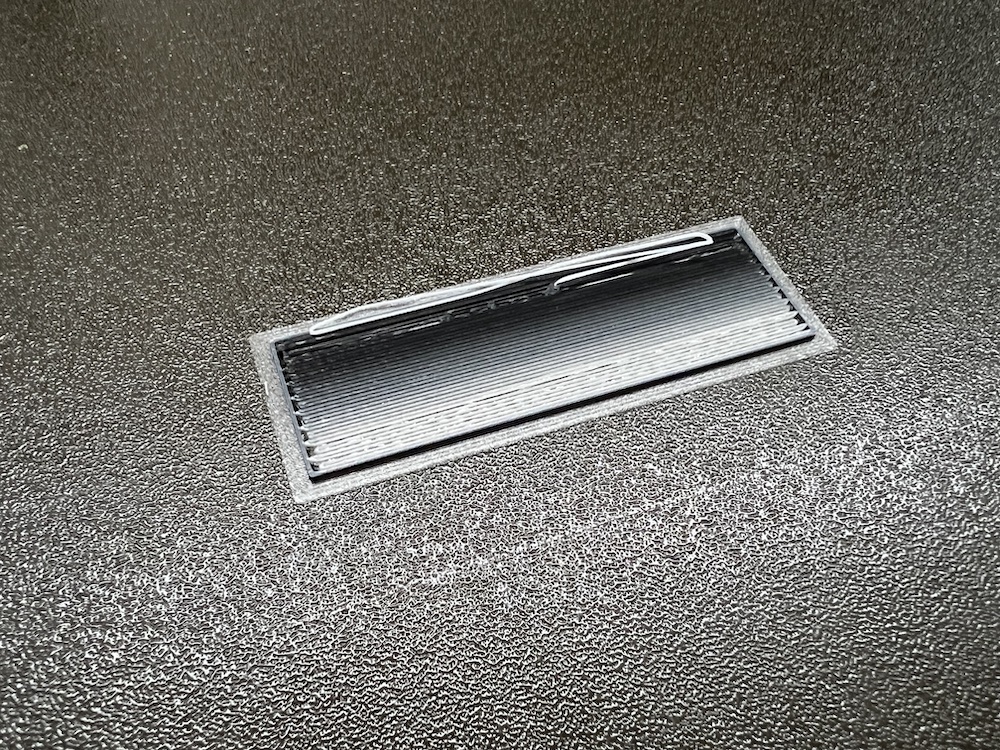 MMU Purge Block for the Label
First, I created a module from the previous OpenSCAD code, which could be re-used to generate a label for arbitrary text. Next, I wanted my label texts to be defined in a CSV file, but OpenSCAD doesn’t support reading CSV data. So, I decided to write this part in Python. A python code will read the CSV file and generate a separate .scad file for each color that would use the previously written module and the data in the CSV file. The python code also positions each label properly in the 3D space. These .scad files can generate STL files from the OpenSCAD command line or GUI.
 8×3 Grid Generated with Python & OpenSCAD
Given that there are only two colors, I only have two STL files that could easily be imported into the Slicer Software and then can be sent for print. 🙂 In PrusaSlicer, I can drag and drop the two STL files, and it asks me if the two STL files are parts of a single object, and when I confirm, they align themselves properly. Easy!
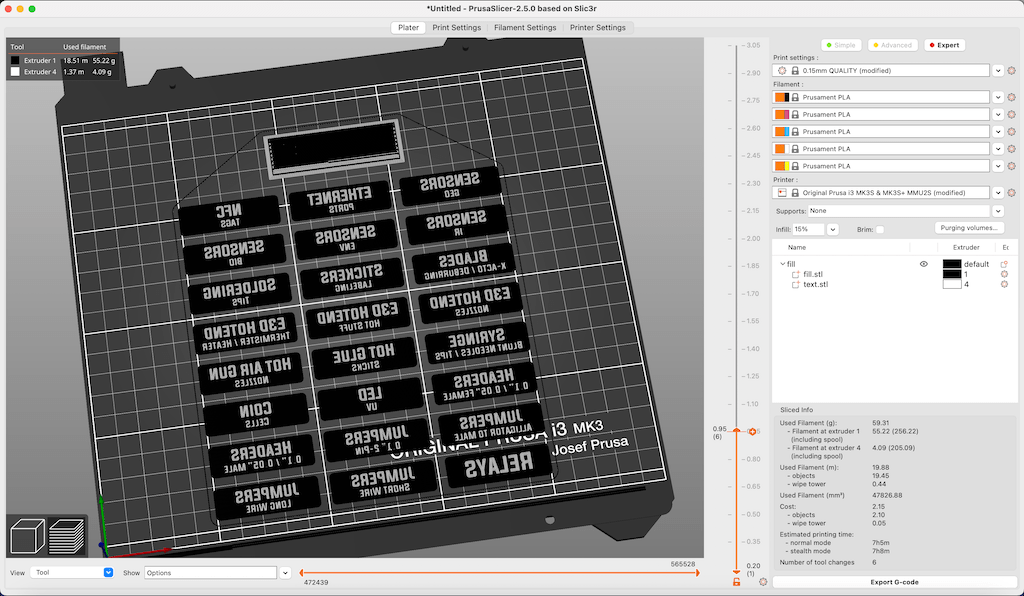 Slicing is easy in PrusaSlicer with only 2 STL files
Excited by this, I confidently printed 8×3 grid labels with the Glow in the Dark filament. But, to my surprise, the text wasn’t visible in light because the glow-in-the-dark filament is translucent and took the color of the filament behind it, which is black!
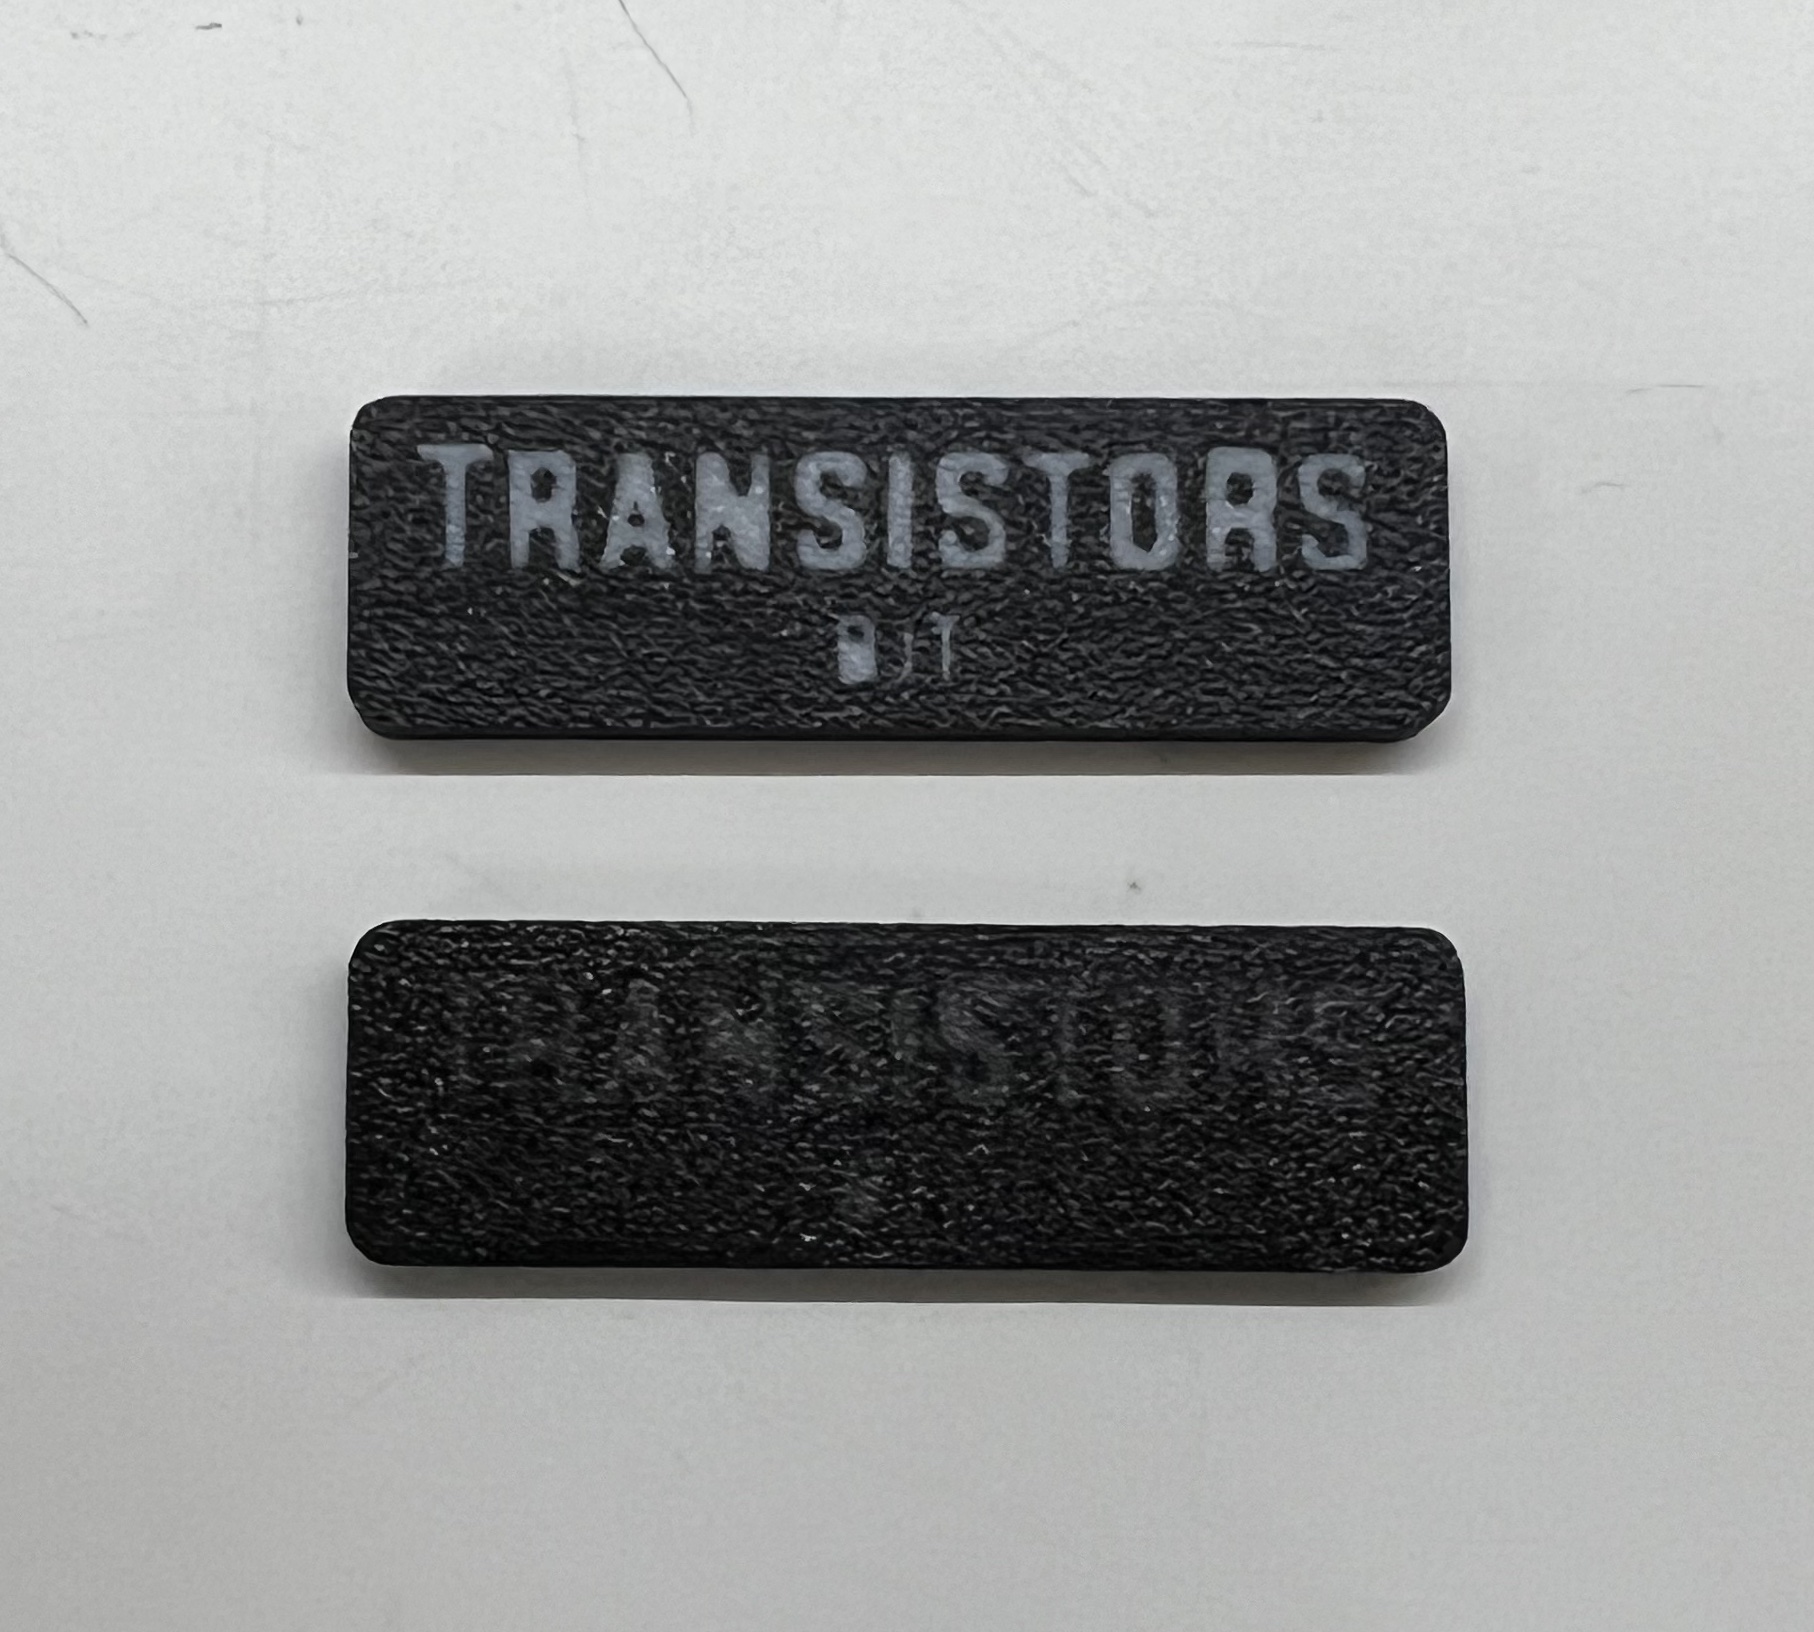 (Top) 2-Color Back & White Print; (Bottom) 2-Color Glow In the Dark Print
This was not going to work, and I needed to fix it. So, I decided to print all layers behind the translucent filament in white 💡. I made the modifications in OpenSCAD and, this time, printed just one label. And it worked! 🙂
 OpenSCAD Render of the 3rd Part for improving the visibility of a Translucent Filament
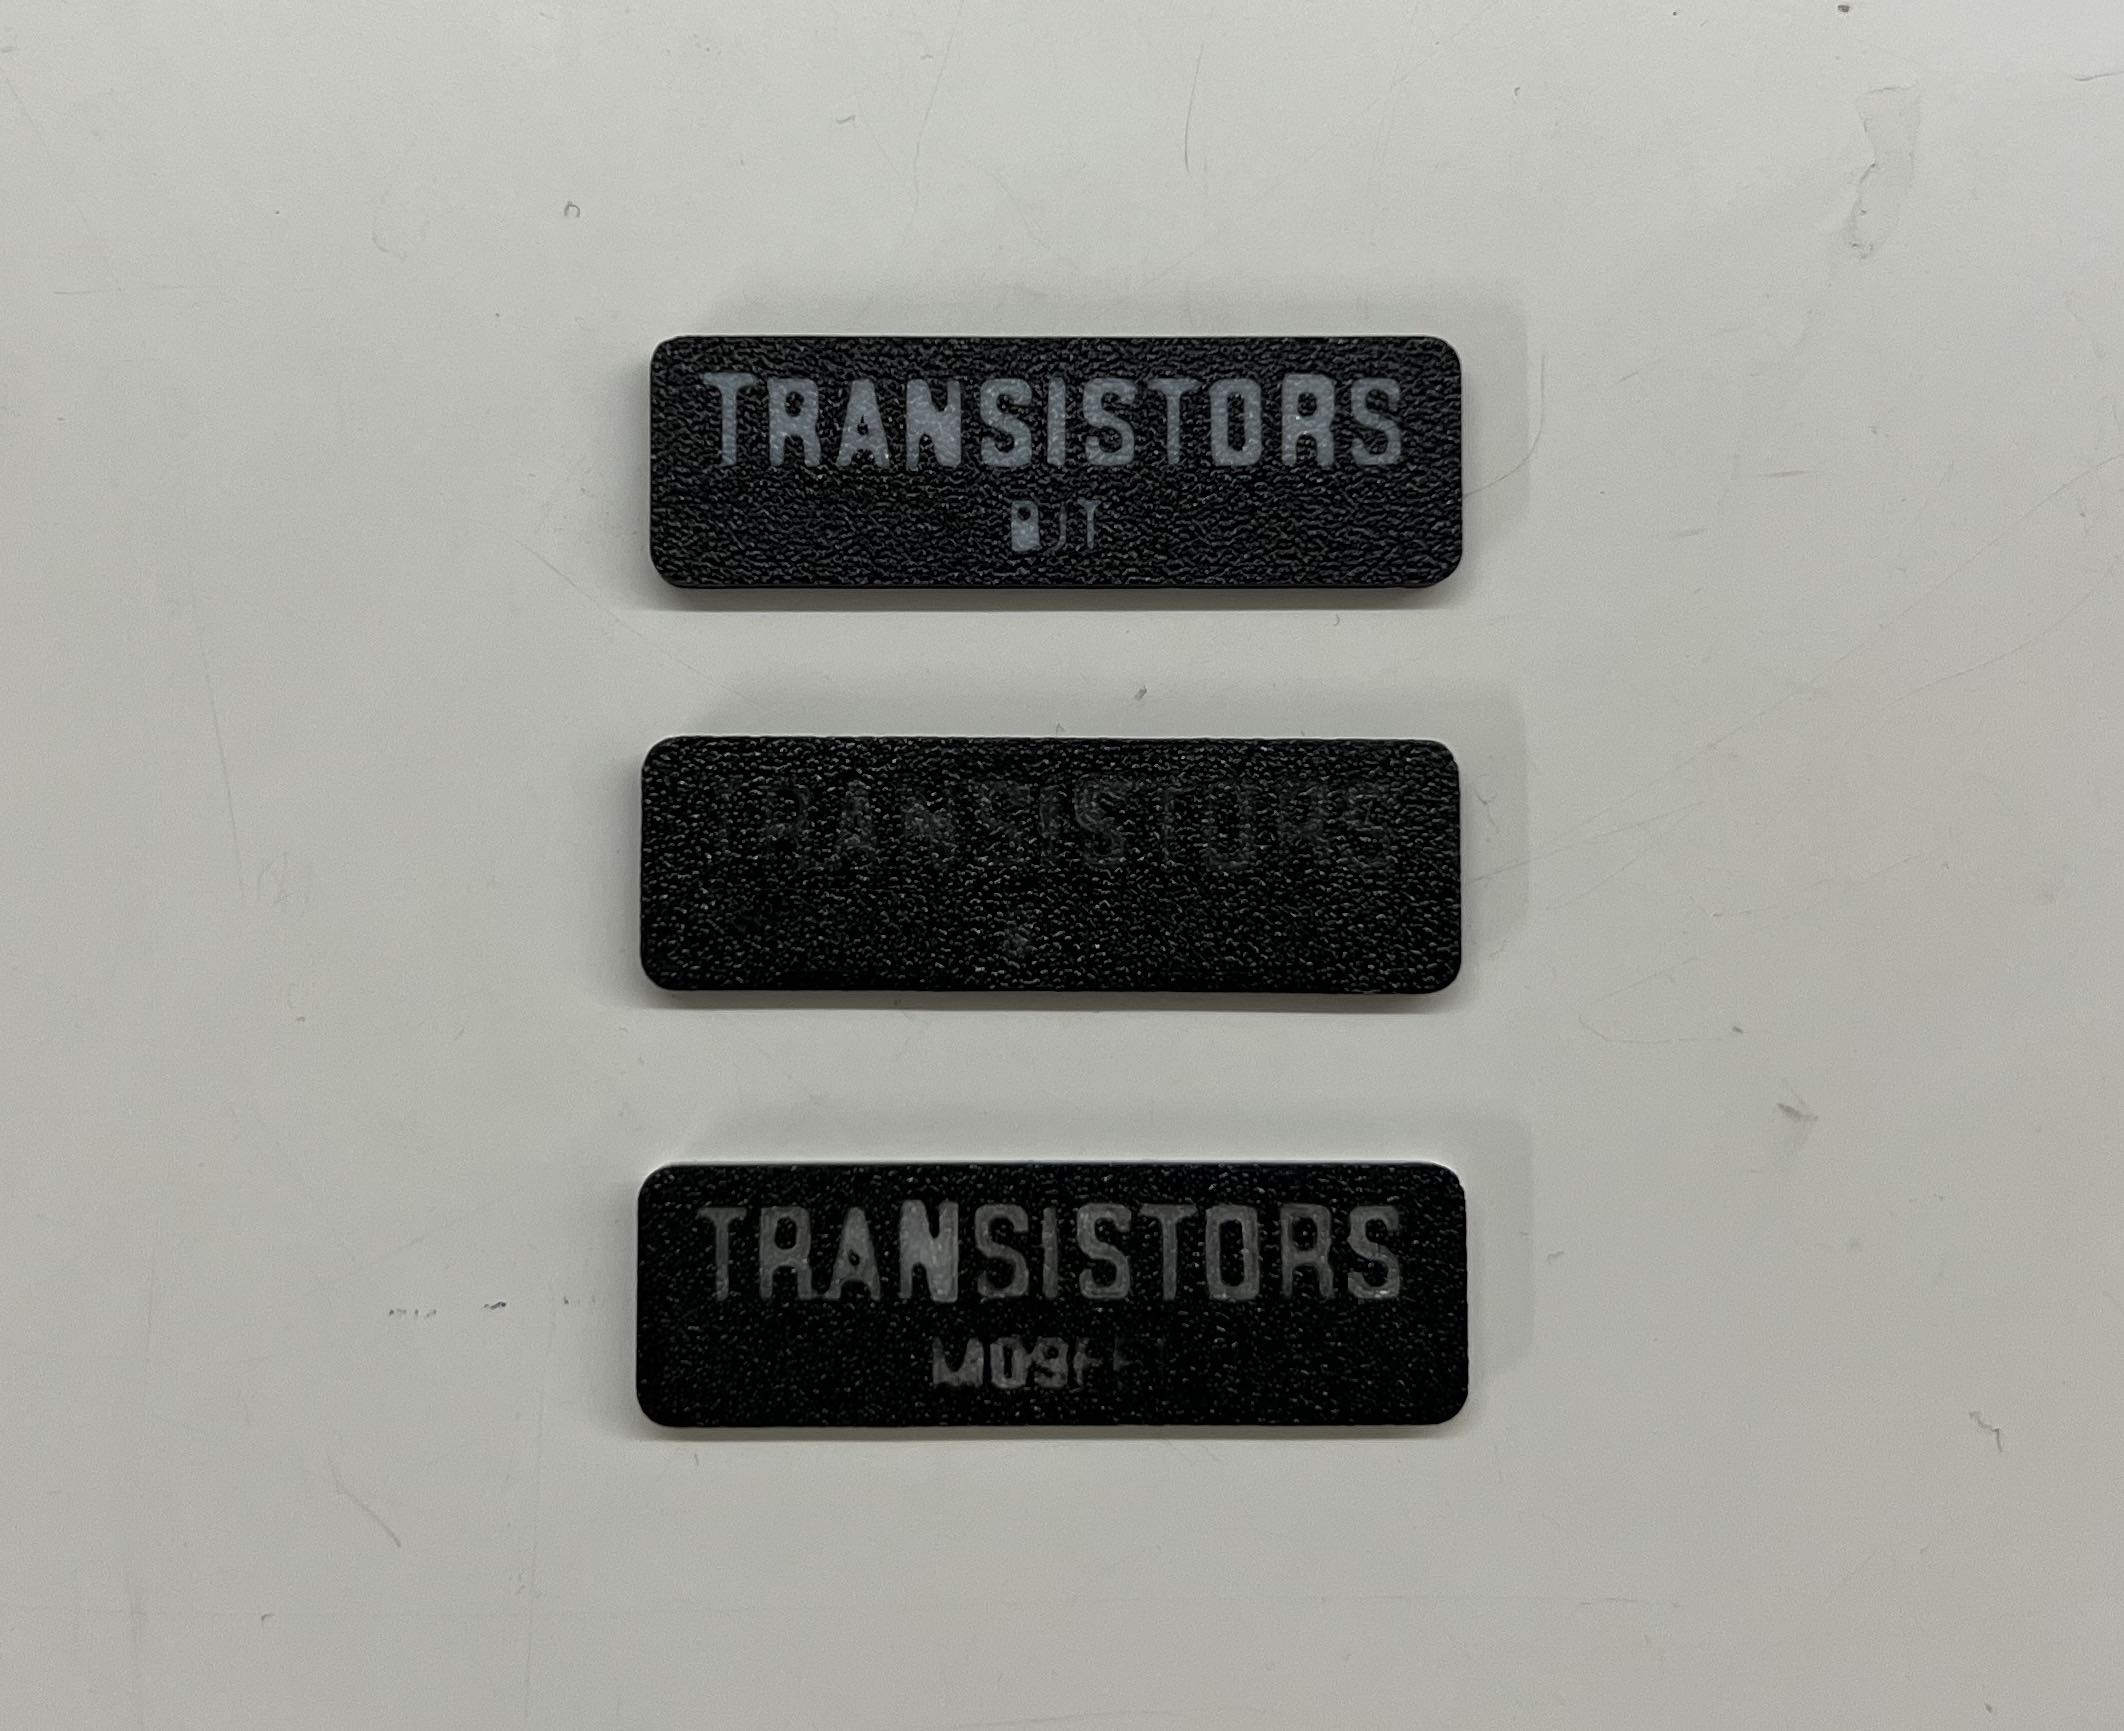 (Top) Black & White; (Middle) Black & Glow-in-the-Dark; (Bottom) Black, Glow-in-the-Dark with White Backing Layers
And finally, I created an 8×3 grid out of it.
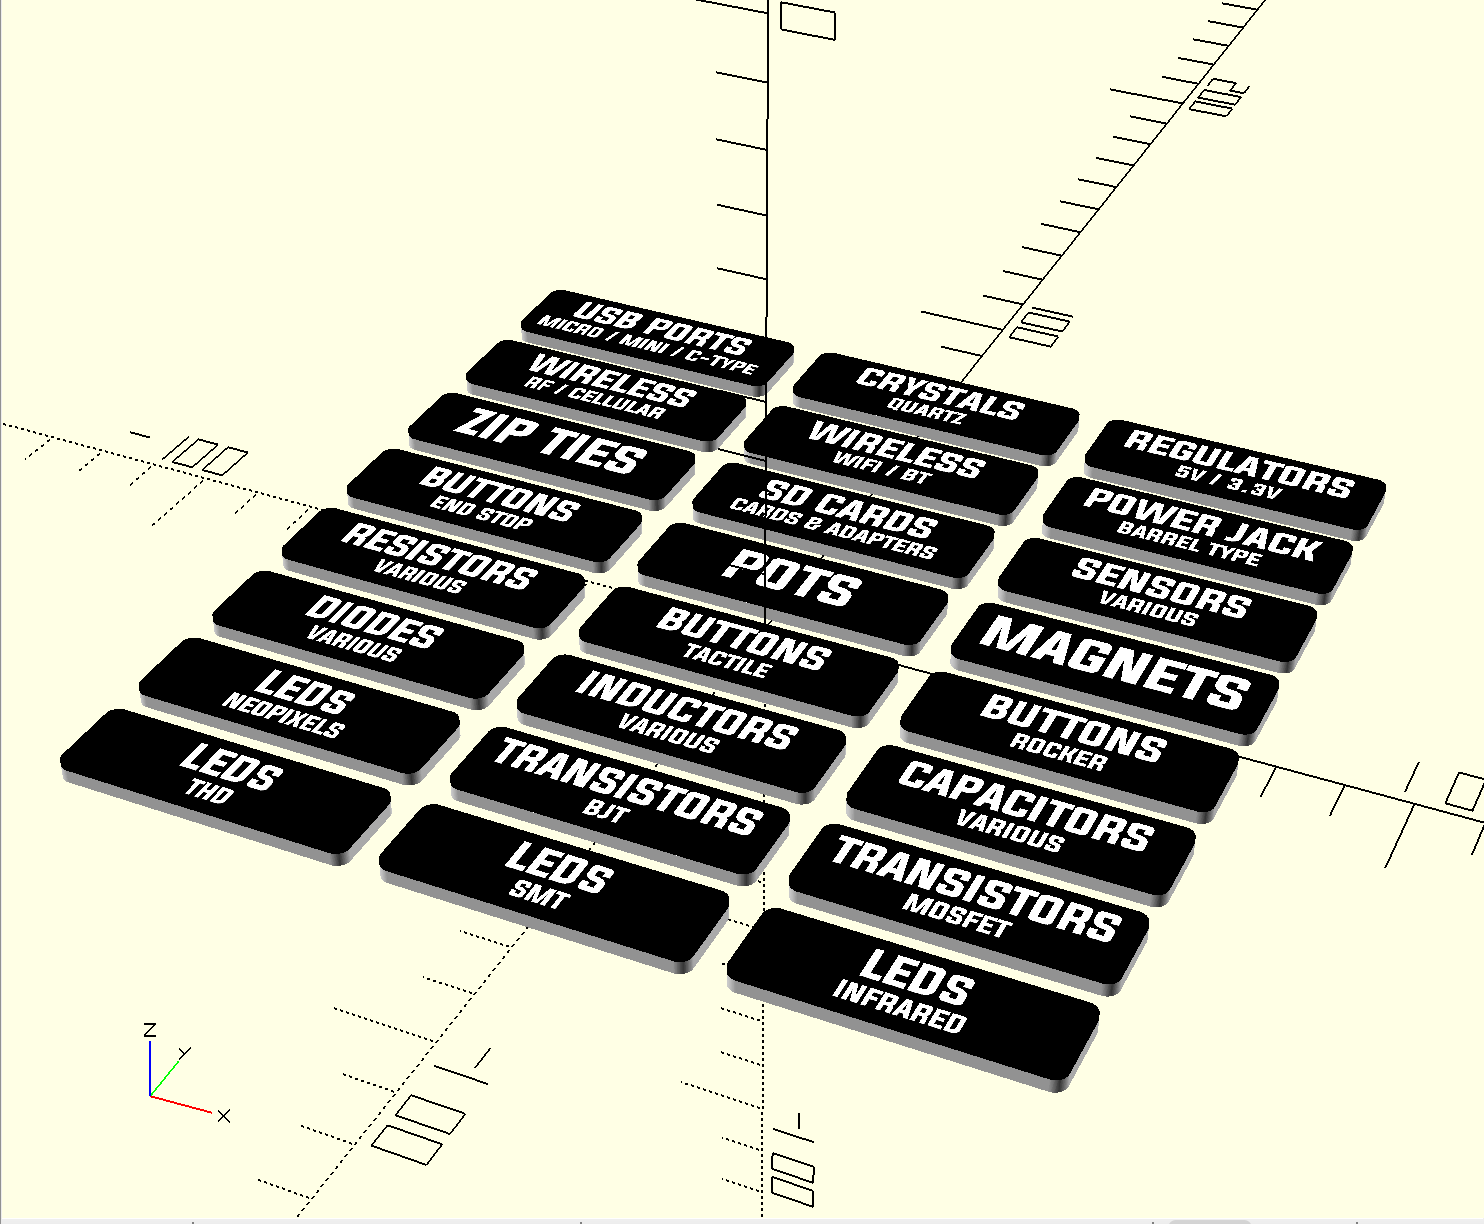 8×3 Grid Render in OpenSCAD with the 3rd Part
And then I printed the new batch, and they came out great. 😃
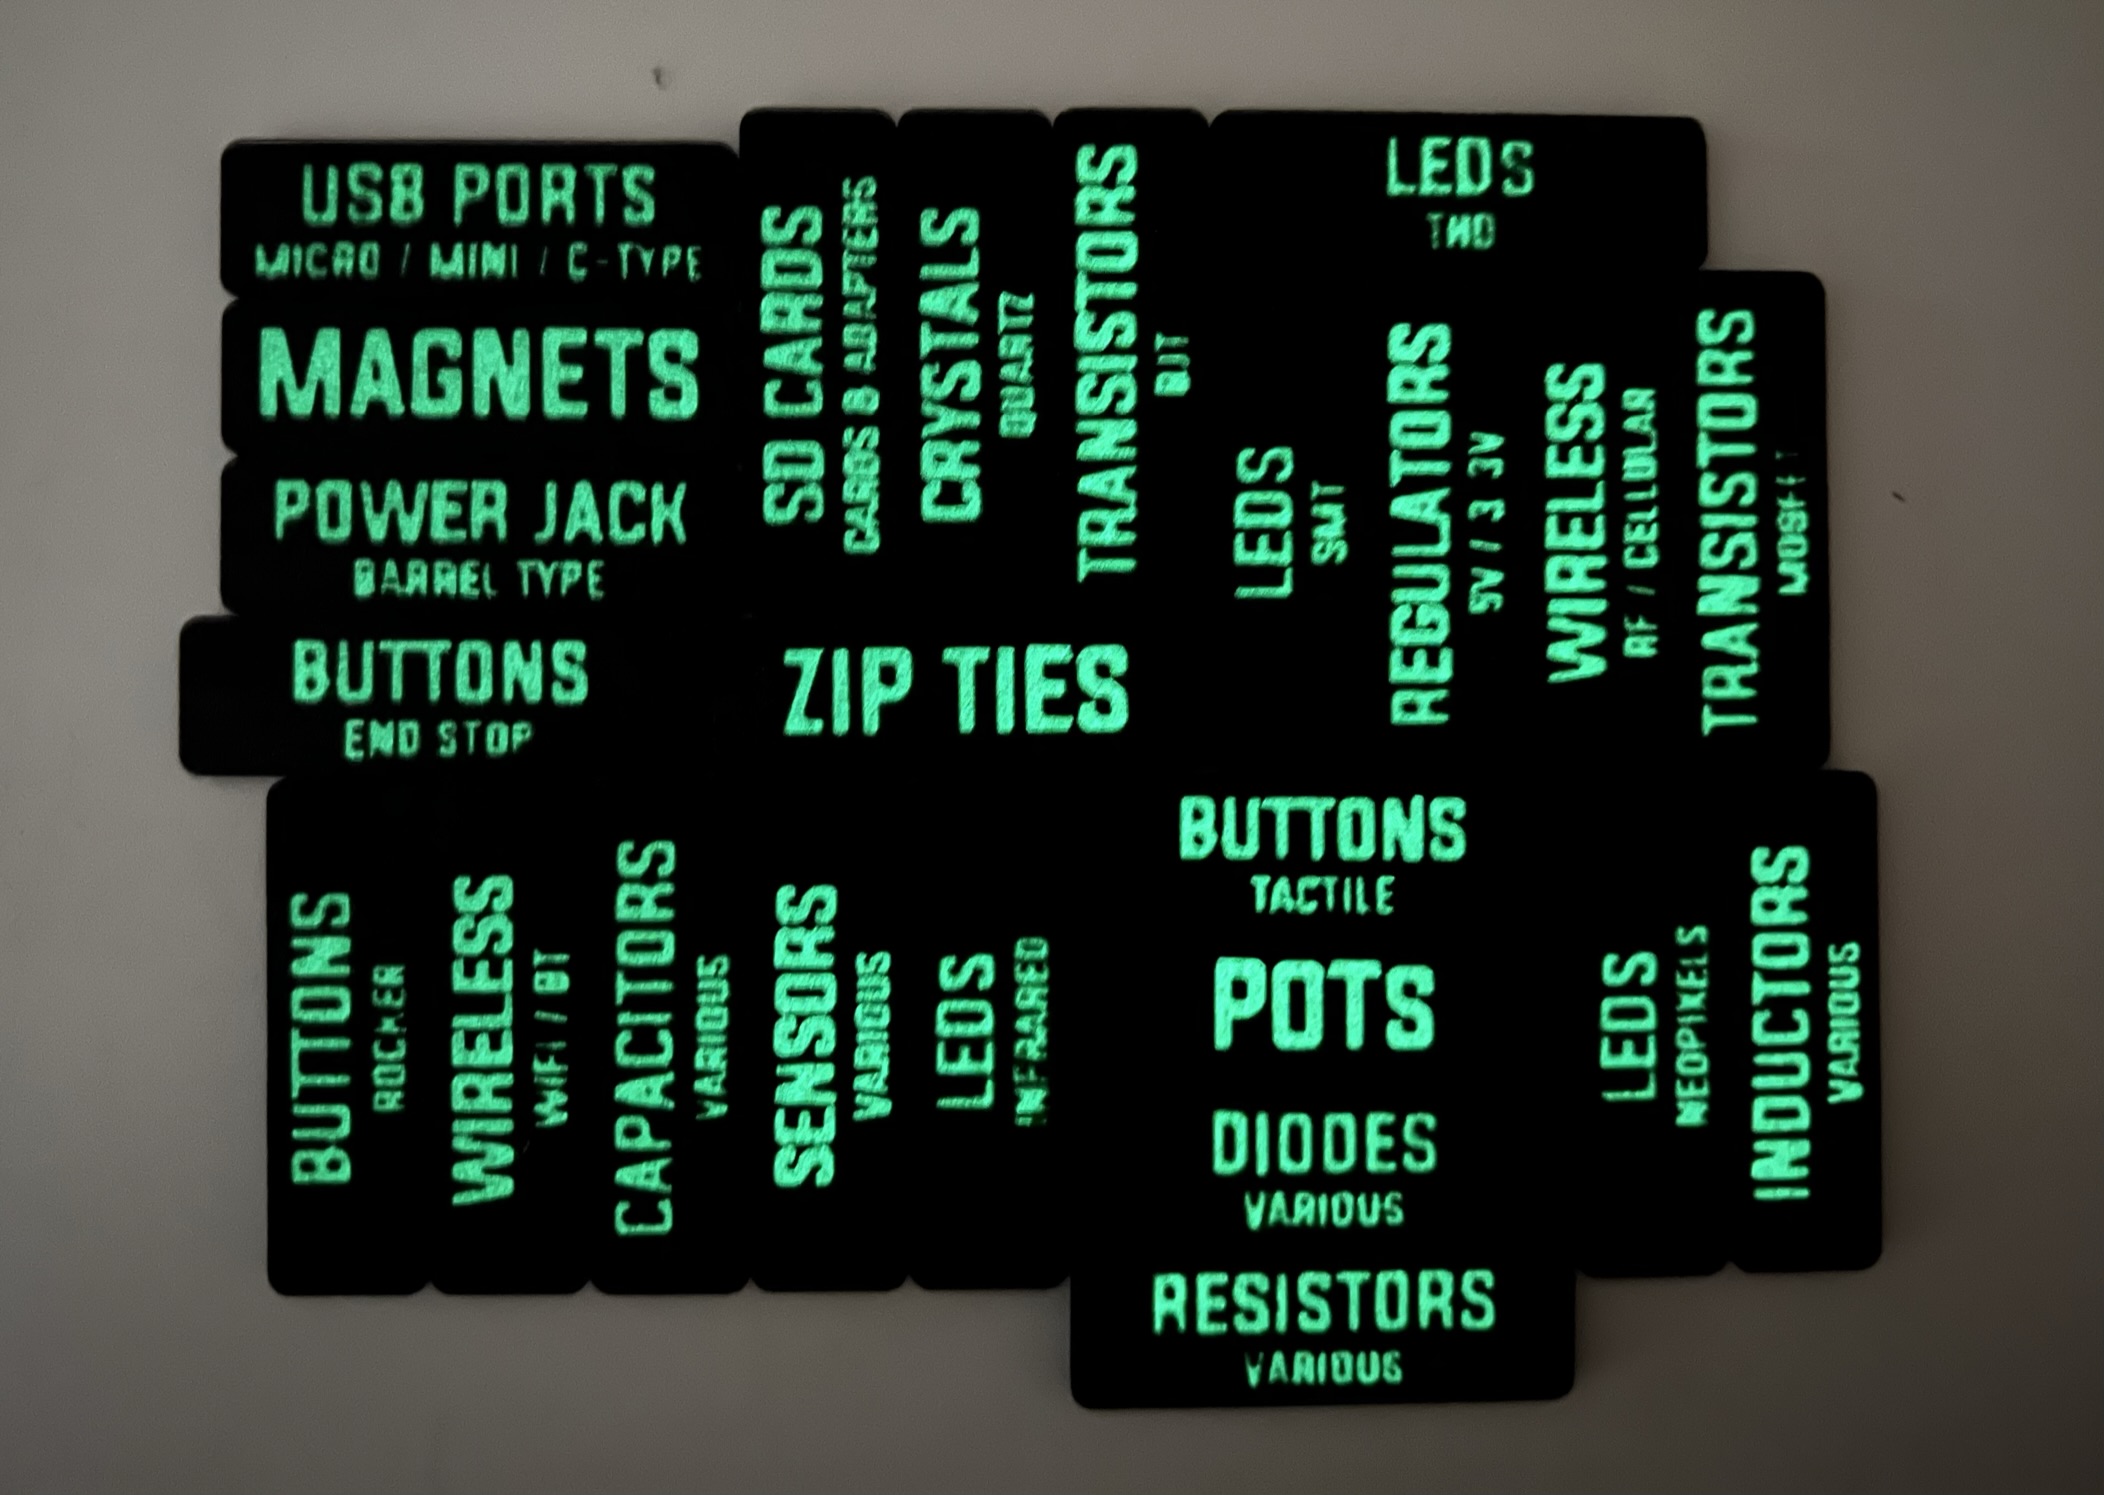
Labels Glowing in the Dark
If you want to make similar labels, the code is opensource, and I made it available on GitHub with setup instructions. If you like this project and want to see more such projects come to life, please follow me on Instagram.
Notes:
- I used AMOLEN Glow in The Dark Filament, which has to be activated with UV light to get a bright glow that runs out quickly. Otherwise, I can barely see the glow, but that is enough to read the text in the dark. 🙂